Originally Posted On RSOPerformance.com
Prepping the Motor for Removal
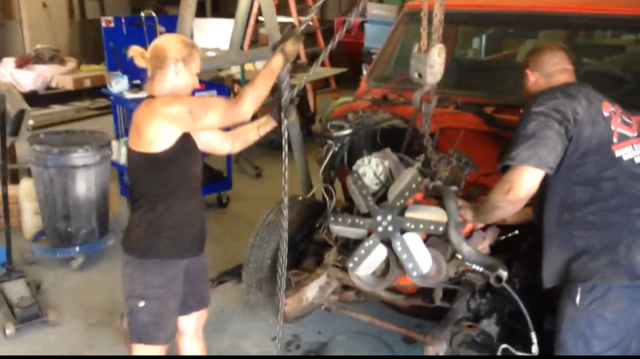 Now, if I thought removing the front end was hard work, removing the motor and transmission tested my patience, my strength, and my endurance! Of course it was in the middle of July and being in Southern California the temperature was a lovely 105 degrees WITH humidity. Needless to say, I drank a lot of water. By mid-afternoon I was definitely feeling the heat and Big Mike sent one of the RSO Guys out to pick me up some Gatorade – thank goodness as this was one of the longest days of my life but also one of the most epic! It all began with getting all the lines undone from the engine to the body, and let me tell you, there are a lot of lines. Just when you think you have them all, there are a few more. One lesson I learned (the hard way, as usual) was that I should have drained the fuel tank before removing the fuel filter – undoubtedly fuel came pouring out (that was a stinky mess). Then disconnecting the fuel lines Big Mike took the opportunity to show me a trick – by inserting a bolt into the end of the line, the fuel will stop leaking out. It’s the little things in life that make all the difference and I thought this one was pure genius. ( I’m sure experienced mechanics would laugh, but there was a time when they had to learn that trick too.) Back to business, the power steering lines had to be disconnected, as well as the speedometer cable. The transmission bolts were undone next, and then the motor mounts, making sure that when we hoisted her up and then forward, she would pull free of the body. Everything was ready, it was time to pull her out. RSO Billy helped me wheel the A-Frame into place, then showed me how to attach the bolts and chain to the motor. Once that was done, I hooked to the chain on the motor to the A-Frame and started pulling. And Pulling. And Pulling. And Pulling!
RSO Shop Girl Tip:
When it comes time to remove the exhaust bolts – FORGET THE WRENCHES AND GO STRAIGHT TO THE IMPACT! Exhaust bolts rust easily, are usually in a difficult spot to reach, and have the tendency to snap when removing. Since they are “exhaust” bolts they are constantly expanding with the heat and then contracting when cooling down. I found it impossible to even budge them with a socket wrench. The impact gun and a shot of Blaster removed them with ease and intact.
Separating the Engine & Transmission
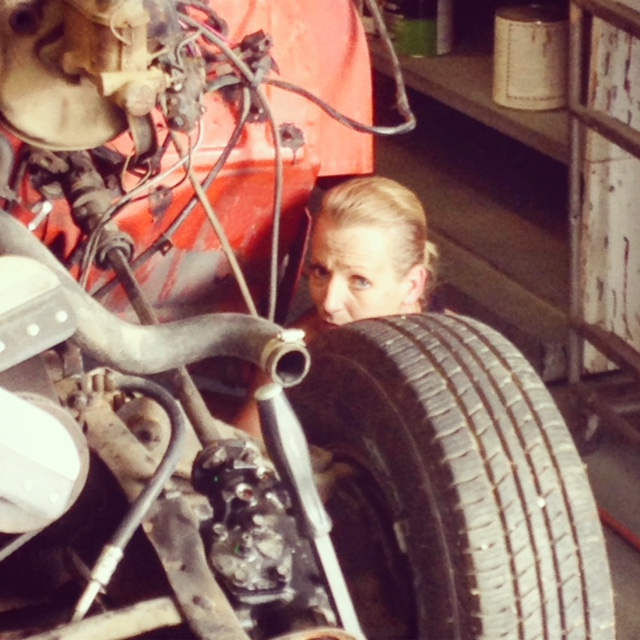
 Once the engine and transmission were finally out, it was time to separate the two. Lowering it down to the floor, I placed a support under the front of the engine so it wouldn’t tip and fall forward once I removed the transmission bolts and the inspection pan that is bolted underneath. I then slipped a flat head screwdriver on the top of the transmission cover to start a gap, then moved on to a pry bar to pull the two further apart, and then separated the transmission from the torque converter. The dictionary defines a torque converter as a device that transmits or multiplies torque generated by an engine. If you have an automatic transmission, you have a torque converter, which sits between the engine and the transmission. It allows the engine to spin “somewhat” independently of the transmission. Now, I have watched numerous videos and read articles online showing and describing how this part works, after seeing them and reading article after article I have come to the same conclusion as RSO Billy, a torque converter works by Black Magic! Lastly, I needed to remove the three bolts holding on the torque converter, my thinking was, “Um, how am I supposed to get to those? They are behind the flex plate.” Big Mike sent me down to the Fabrication Shop and told me to ask the guys for a fly wheel turner. Once I brought it back he showed me how to use it to latch onto the flex plate and move it, so I could get to the bolts inside through the large holes surrounding the middle of the plate.
RSO Shop Girl Tip:
A Fly Wheel Turner is for turning and holding flex plates and fly wheels. It is designed to lock on to the flywheel’s teeth and turn the crankshaft, which makes getting to those “unreachable” bolts simple. It’s not a tool that will be used on a daily basis, but one to definitely have in your tool box (relatively inexpensive) essentially saving you time so you can be productive and move onto the next step of your project.
Finishing Up
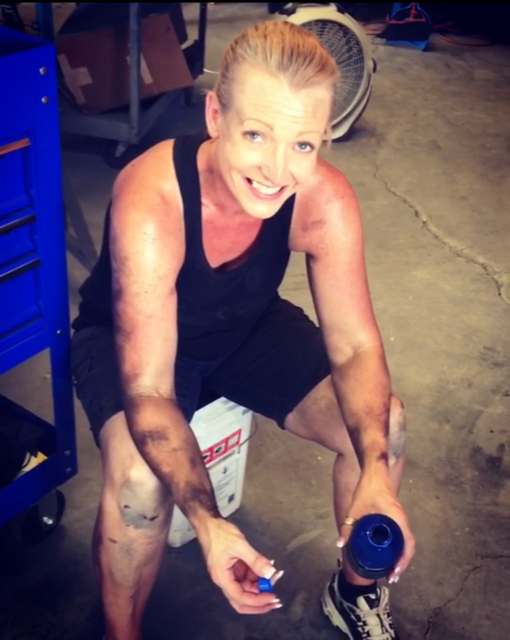 The final step was an easy one, putting the engine on a stand. Since I had already done that with my engine block, I knew what I needed to do. I removed the backing plate on the stand, and maneuvered the bolts to center it then hoist it back up with the A-Frame to insert the stand and bolt it on. Talk about a proud moment, not only for me but for Big Mike as well. The look in his eyes was enough, he didn’t have to tell me how proud he was – it was clear for me to see, but he did tell me anyway. If I hadn’t been so dirty, greasy, and exhausted I would have wanted to go celebrate pulling my first motor!