Originally Posted On RSOPerformance.com
Fabrication = A Lot Of Math = My Brain Just Exploded
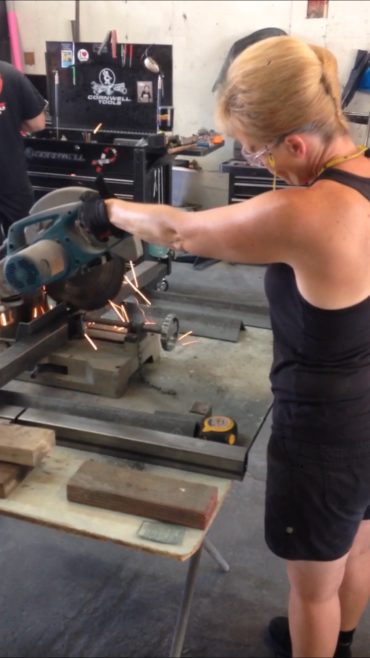
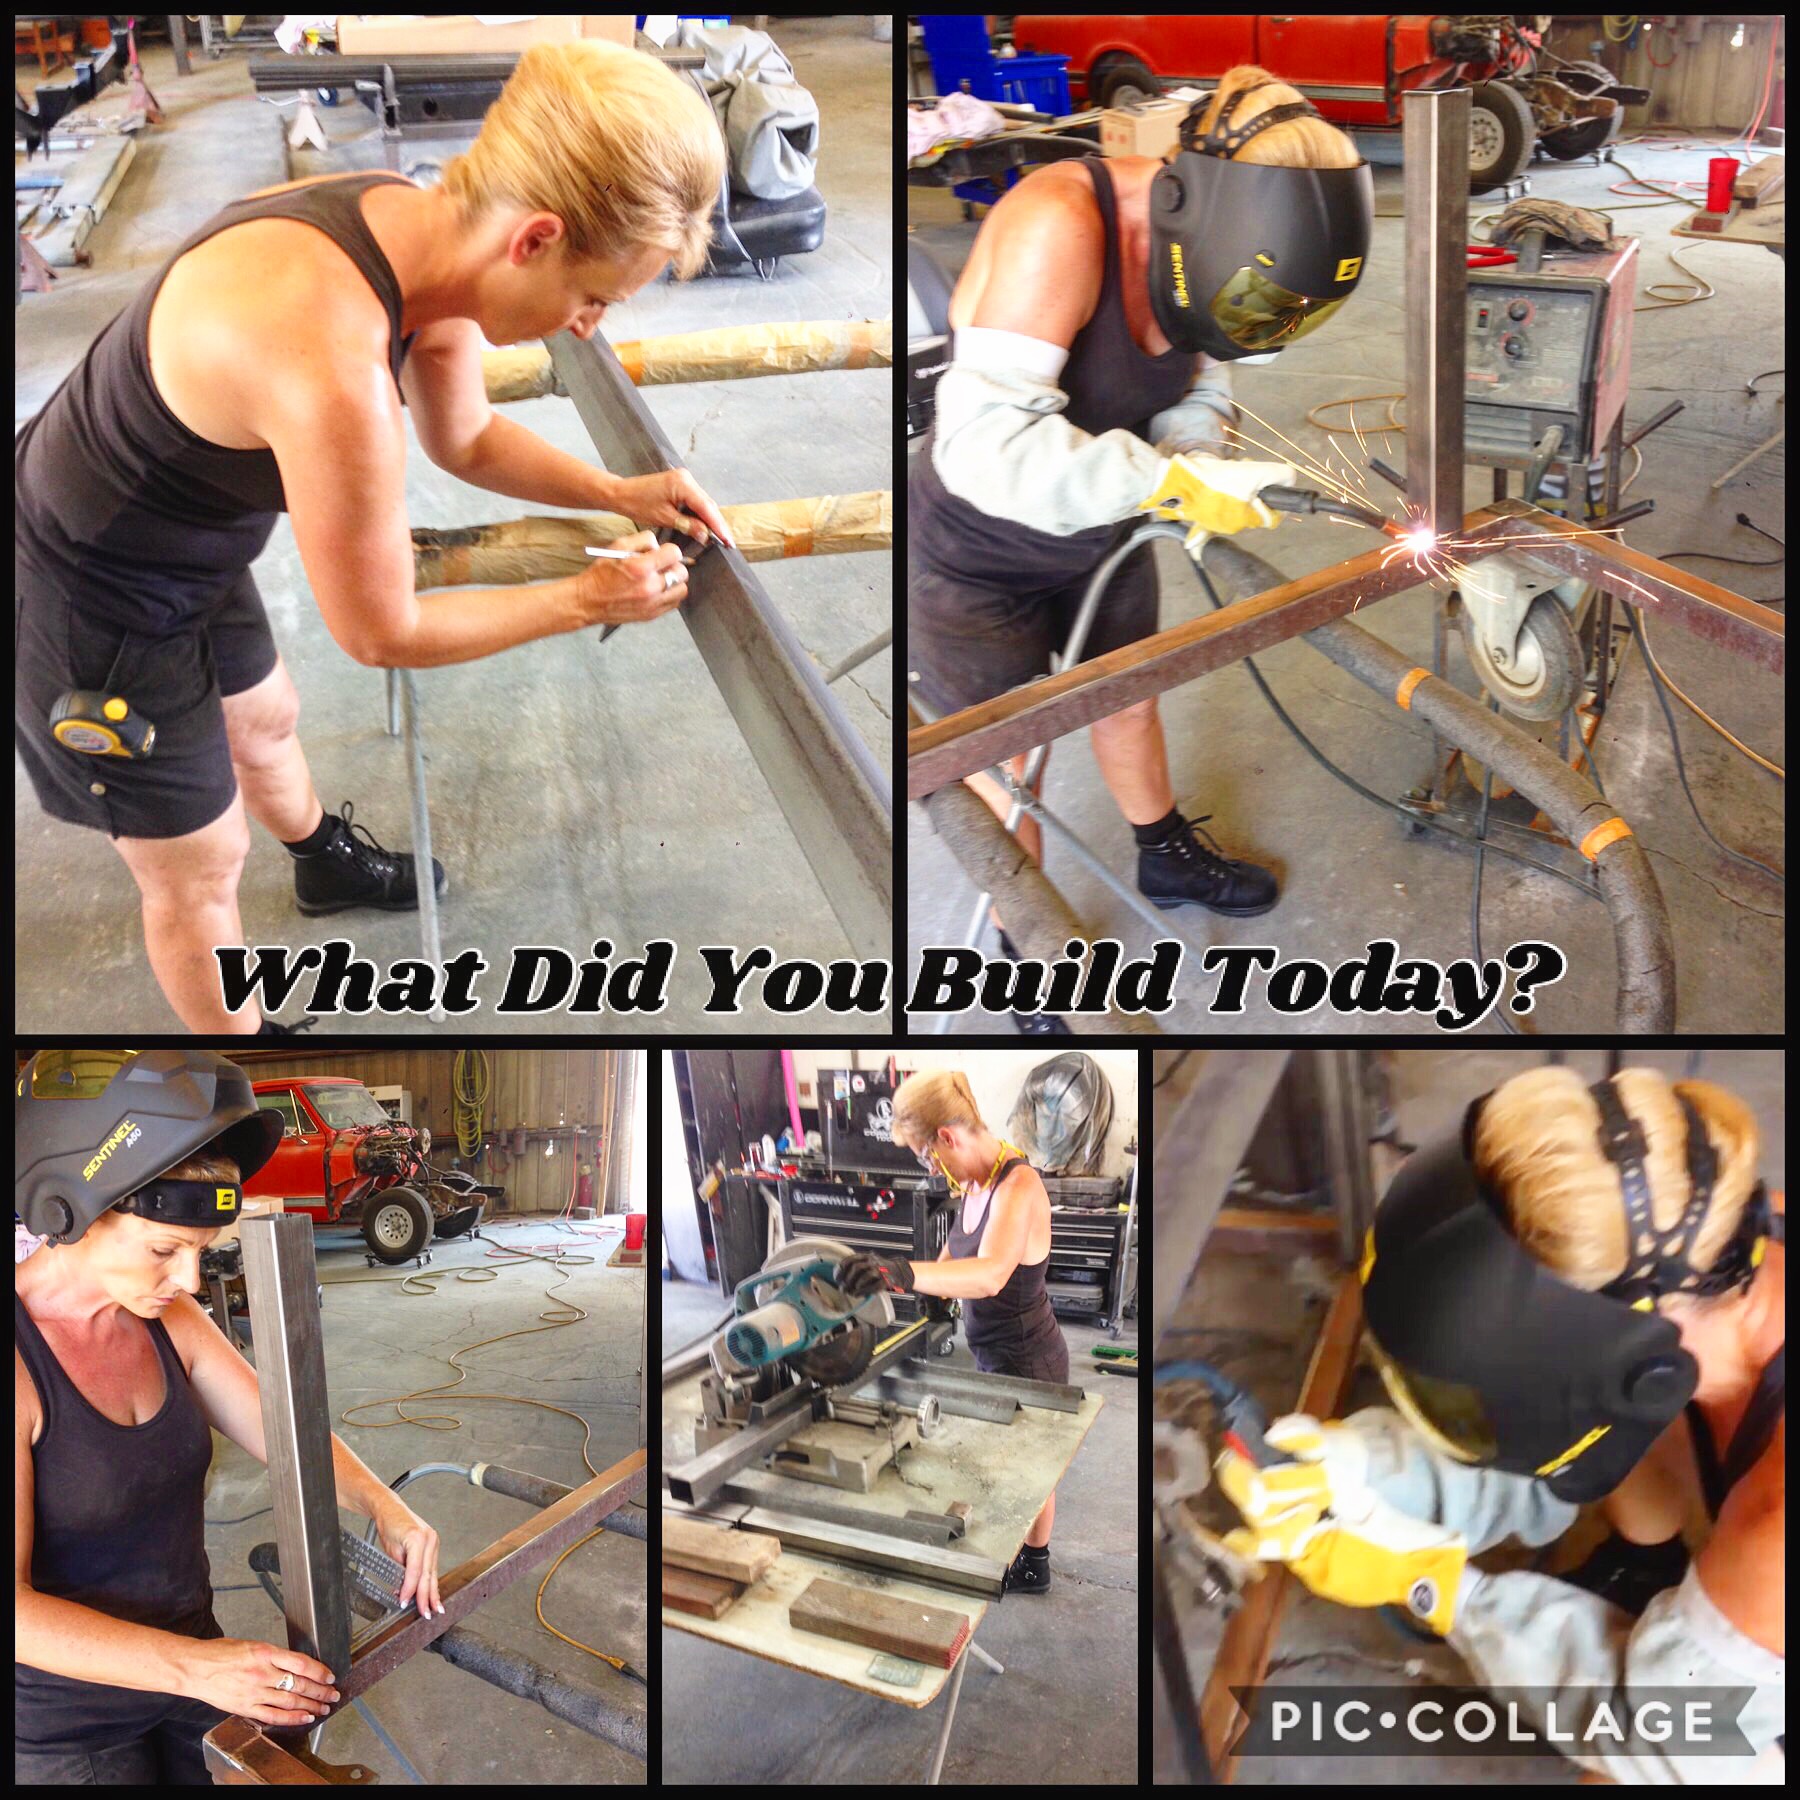 For years I have been in the business of numbers via sales, book keeping, and accounting. Making one think that the math of fabrication would be easy for me. However, fractions are a different animal all together. So, came a quick lesson from Big Mike on how to properly read a tape measure, to always start from center, and to properly measure, cross measure, and measure again – this may be the point where my brain exploded! Thankfully I picked up the lesson quickly because before I could remove the cab from the body, I had to first build a cart for it. We have numerous body carts here at RSO, and the one we were going to use needed some modifications. Of course my cab wasn’t going to fit the top braces, as this particular cart was specifically designed and built for a Toyota FJ45 cab, but thankfully we were able to salvage the bottom so I only had to rebuild the arms and top braces. The first thing Big Mike said we had to do was take some measurements, going from the center of the body mount to the center of the body mount on the back of the cab (side to side – 37 1/4″), then again on the front (side to side – 41″), and again from front to back (42 1/4″). Once we had those measurements, we added on 1 1/2” to each side (only the front and the back). The measuring ensures we make the top braces proportionate to the cab and still have the ability to drill in the holes for the body mounts without being at the edge of the metal. After cutting the arms and top braces off, we headed to Talley Metal Supply to pick up 2” square tubing for the arms and 3” x 3/16” angle for the top braces. Marking each section with a Silver Streak Welders Pencil where I needed to make my cuts, it was now it was time for the fun part! POWER TOOLS: Using the chop saw I cut the tubing into 4 sections for the arms at the height that I thought would be good for me to be able to work on the cab comfortably. Then I went ahead and marked the angle to cut it for the top braces to support the cab.
 Old Welder vs. ESAB
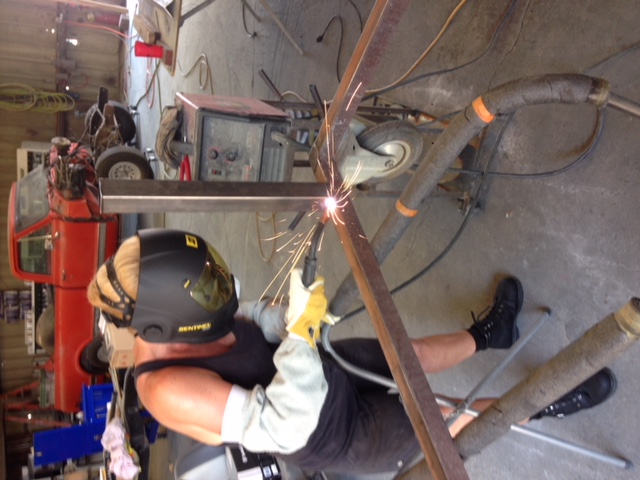
Once all of the cuts were made, it was time to clamp the arms on so I could tack weld them into place, then measure again just to be sure it was sitting correctly before laying the final weld. I started out using an old welder that was already down in the body shop and NOT the ESAB I am used to. I made my first few tacks, and couldn’t believe how crappy they looked. My thought was that I was out of practice, and the more I used that welder the madder I got! I knew my welds were prettier than the mess I was laying out, so I ditched the old welder walked down to the fab shop and stole the ESAB to finish the cart. Granted, a good welder should be able to weld anything and with any welder. I have only been welding a few months and being a spoiled woman, I started with our ESAB Caddy Mig C200i welder. Anything else is just not up to par for me. For example: It’s like driving an old rusty pickup, she may still run and get you to your destination but it may take a while and it’s going to be a bumpy ride as opposed to a new luxury car, that can get you to the same place but a lot quicker and with ease.
 Welding in 112 degrees = One HOT RSO Shop Girl

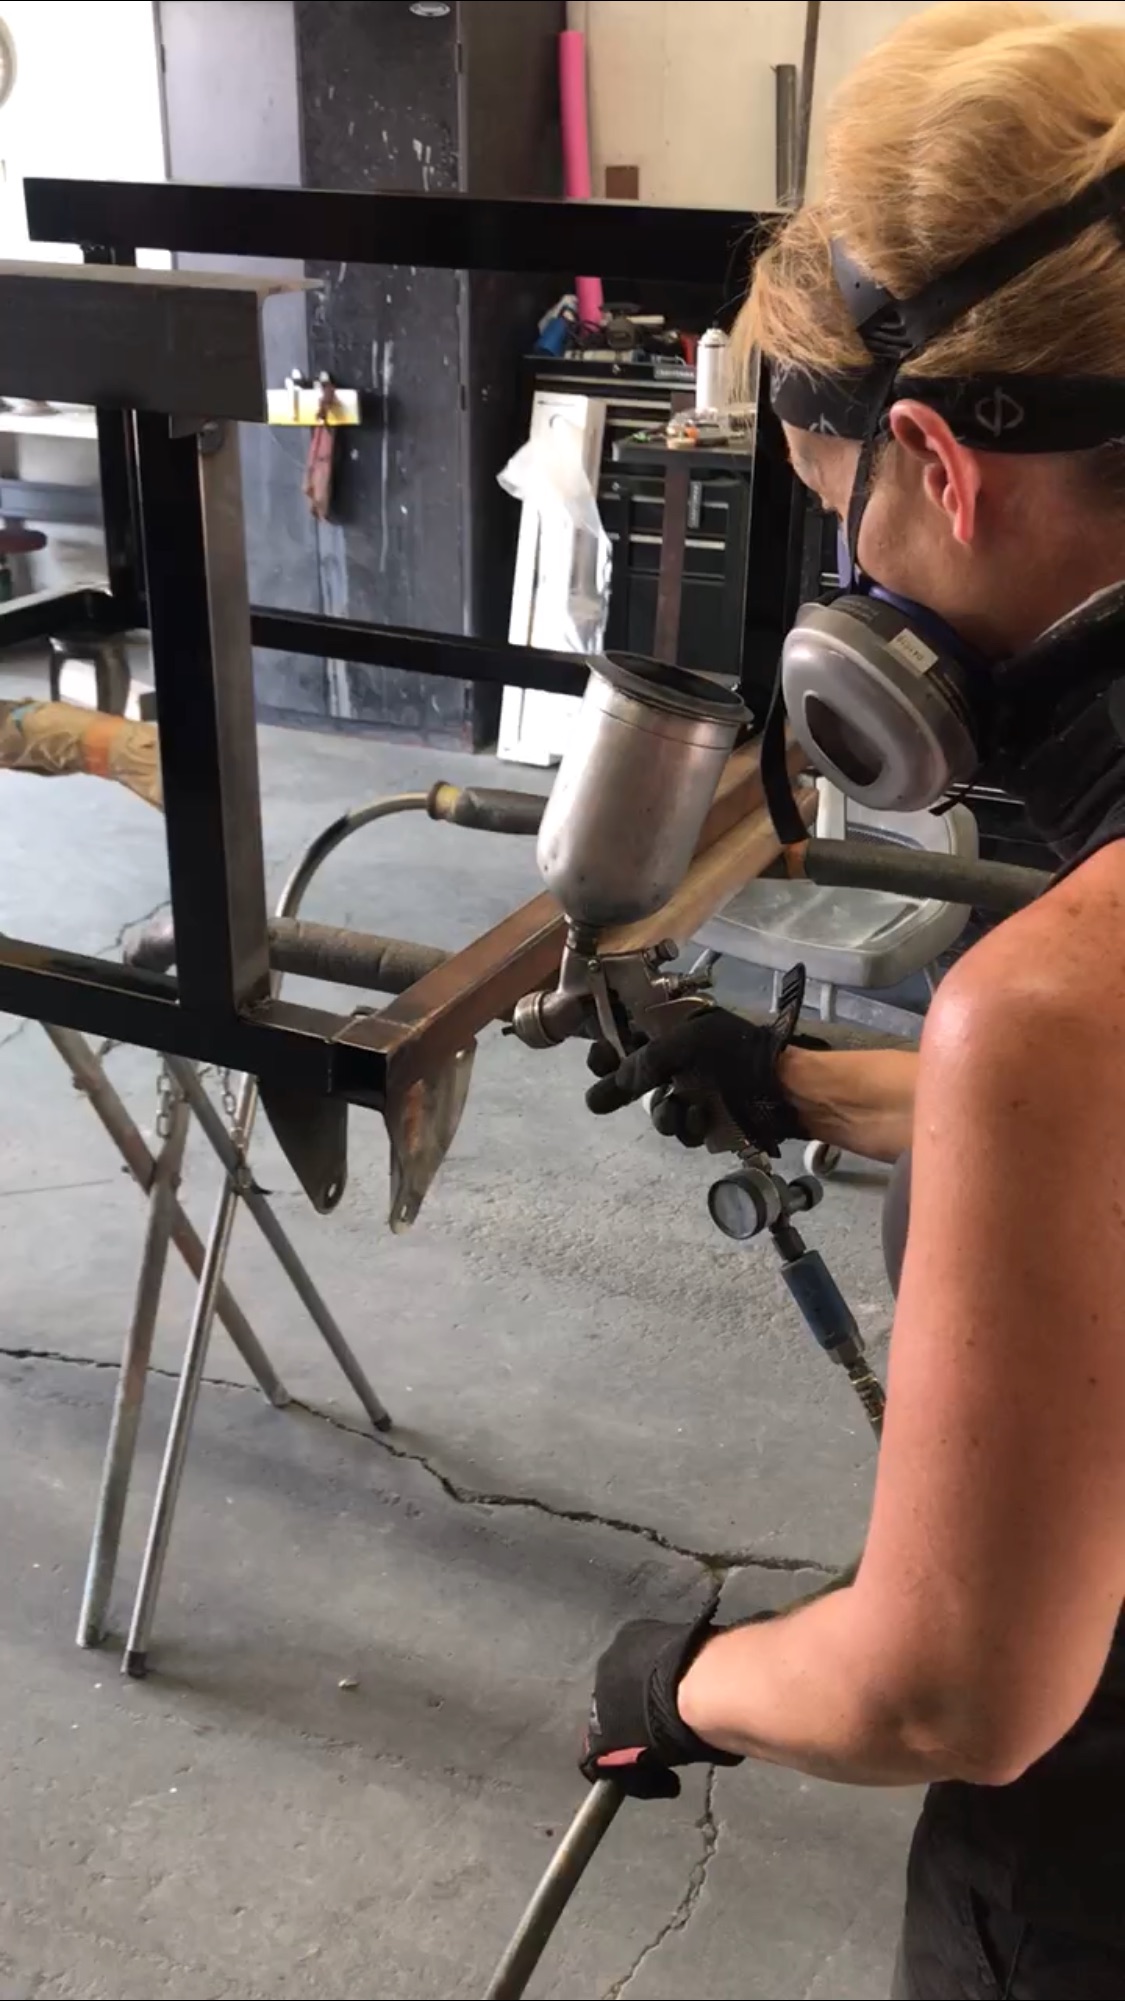
I know I have mentioned before just how hot it gets down here in Southern Cali, but welding in 112 degree heat is not just hot, but Bloody Hell HOT! We do have swamp coolers and fans in each Shop that pretty much run non-stop during business hours, but when you are welding you cannot have a fan blowing directly on you because it will blow away your shielding gas ~ thus the shorts and tank top. After hours welding, my cart was finally done and ready to be prepped for paint. My reward: getting into my pool to cool down, I’d like to say “Jumping into my Pool”, but as you can see by the pic, it’s a kiddie pool. SNORT!
RSO Shop Girl Tip:
I know I should have worn a welding jacket (I do own one) but I literally thought I might melt with just the gloves, sleeves, and helmet on! So after a day of welding, of course I noticed my burn. An arc burn is NOT like a sunburn. It may have a few similarities as far as redness and peeling but for me that was as far as they went. The arc burn didn’t hurt like a normal sunburn does, nor did it last as long as everyone told me it would (varies person to person) it didn’t really bother me at all until it started to peel. I call this the, “She Dragon”, which is not as sexy as it may sound – hahaha. When the
burn was ready to peel, it turned really dry, and broke into what felt and looked like scales on a dragon. It was the “feel” that bothered me most of all, not the appearance (which was a dark coloring). Now, I know that this is a blog about building a truck but keep in mind that I am a woman, and even though I’m out in the Shop with the guys it doesn’t mean I want to look like one of the them and I certainly don’t want my skin to feel like a man’s. Luckily I have a background in skin care, I get numerous requests from friends to try new cosmetic or skin care lines and give them a review. So I have a little secret that I will share with you. I have used Scrubtini for about 2 years, and every time I put it to a challenge it simply amazes me! Very rarely am I impressed with a product to where I’ll actually order it. But, in regards to this particular product I ordered, and have continued to do so repeatedly. I knew it would get rid of the dragon skin, just didn’t have any idea how quickly, 3 days and it was completely gone!