Bower Power Hour: Click Here
Bower Power Hour Episode 15: Click Here
Tech and Tools ARTEC Truss Kits: Click Here
“30Pack” Matt is the Tech and Tools guru from Bower Power Hour. He walks guests through installs, tech, buying parts, and more. All work is done either on Matt’s personal buggy or the Craigslisticon, Bower Power Hour Producer Gabe’s jeep for both offroad and daily driving. In this episode of Bower Power Hour's Tech and Tools segment "30Pack" Matt talks about the advantages of the ARTEC Truss Kits.
 Matt: Today we’re talking about factory axle housings, why aftermarket housings are so popular, truss and sleeve kits, and what we decided to do with Gabe’s “Craigslisticon”.
Charlene: What’s the difference between a stock housing and an aftermarket housing?
Matt: Today's vehicles are focused on fuel economy. The best way to improve fuel economy is to strip and lose weight. The less weight going down the road the better the fuel economy is going to be. However, it’s not always good to strip weight off of certain parts of an off road vehicle. For example, stock Dana 30s and 44s in a JK have a reduced axle tubing thickness and diameter. Not only are they smaller around, they’re also thinner. The Dana 30s and 44s are not really up to the task of wheeling on moderate to hard trails. We’re going to address that issue with some aftermarket parts.
Charlene: Are aftermarket housings thicker than factory housings?
Matt: Yes. The aftermarket housing solves all the problems that come with a factory housing. A stock JK Dana 44 housing has a 2.5 inch outside diameter with a 1/4 inch wall thickness. An aftermarket housing is thick and burly. It has a 3 inch diameter with a ½ inch wall. You gain all the strength you need. An aftermarket housing doesn't need all the truss and gussets because it's so strong. However, the factory stock housing can get destroyed quickly if it doesn't have the truss and gussets before going offroading.
Charlene: What’s the difference between a truss kit and a sleeve kit?
Matt: A truss kit goes on the outside of the axle and a sleeve kit goes on the inside of the axle. A sleeve kit gussets the knuckles and includes a sleeve, another tube, that gets slid inside the axle tube that you already have. It increases the thickness of the axle tube, but it also decreases the inside diameter. Due to this you can't run a 35 spline axle with it. However, if you want to run a larger spline you can use a truss kit because a truss kit goes on the outside of the axle.
Charlene: You picked a truss kit for Gabe’s “Craigslisticon”?
Matt: We chose a truss kit because we wanted to go with a 35 spline RCV Axle shaft. We wanted the ultimate strength and we had already found a used 35 spline ARB RD157 in our price range. The truss kit solves all the problems with the stock housing. By welding it to the outside of the housing, the axle becomes as bulletproof as we need for moderate to hard trails.
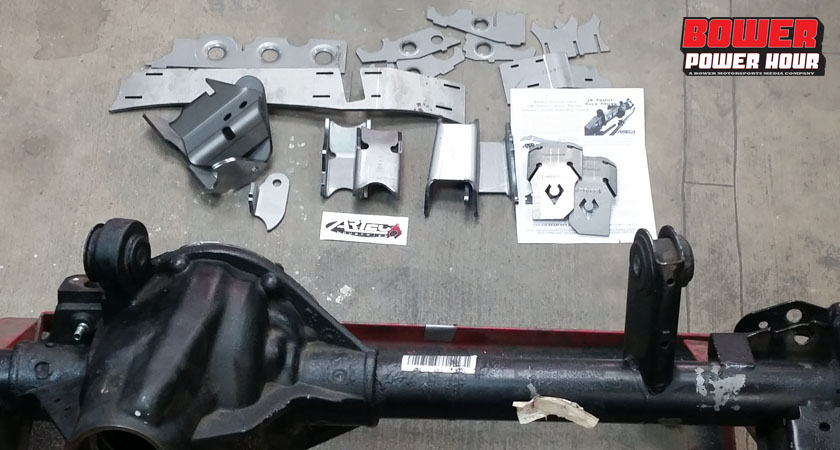
Charlene: We have the ARTEC truss kit for the Dana 44 Rubicon JK with the raised track bar bracket. What did you do to the stock axle to get it ready to put this truss kit on?
 Matt: The first thing we did, was of course, clean off the axle. I talked about this in more detail in Episode 1. I like to use sanding pads, scotch brite pads, wire wheels, anything and everything. Most of the time I use a quarter inch air grinder because it’s smaller and you can get into tight places. It's really hard to get between the inner C’s and the coil buckets.
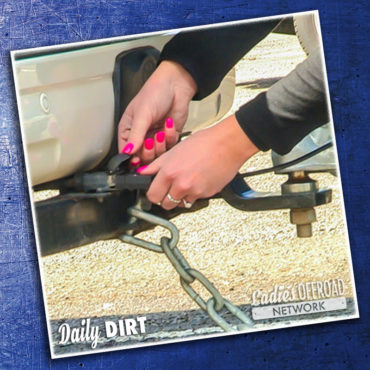
The other thing that we needed to do was remove the track bar and steering stabilizer mount that were on the factory housing so we could put on the raised track bar mount. ARTEC offers two different options: a factory track bar mount and a raised track bar mount. You want to go with the raised track bar if you want to do a drag link flip which is where the drag link gets flipped onto the mounts. Doing this helps keep all your steering geometry flatter which reduces bump steer. For the “Craigslisticon” we went with the high track mount because we are going to flip Gabe’s drag link.
Once we got it all cleaned up, we started fitting the truss on and tacking it into place. Before you start welding the truss, you need to remember that part of this truss welds to the cast iron center. When welding the truss onto the cast it's best to use a nickel rod with an arc welder. However, a mig welder seems to do a good enough job. I haven't had any casts crack completely, but I have seen some get small cracks from the heat change. The best way to avoid this is to pre heat the cast. After you start tacking it on and you're getting ready to weld, use your torch to heat the cast to 400 degrees. It needs to sizzle or pop when you sprinkle water on it. This helps prevent the cast from sucking all the heat out of the weld. We welded the cast in one pass in order to keep it nice and hot. We want heat on the cast but we don't want heat on the axle tubes and all the brackets. Heating up the axle tubes and brackets will cause the axle to bend and tweak into a smiley face pulling the whole top of the axle. We’ll be trying to keep the axle straight by installing a truss, and we’ll actually end up bending it while we weld if we’re not careful.
For the rest of the truss, we went through and did 3 inch stitch welds being very careful to skip around and only do a little bit of welding at a time.
Charlene: Now that we're all welded up we have a brand new axle truss on Gabe’s “Craigslisticon” we’re headed to the inner workings.